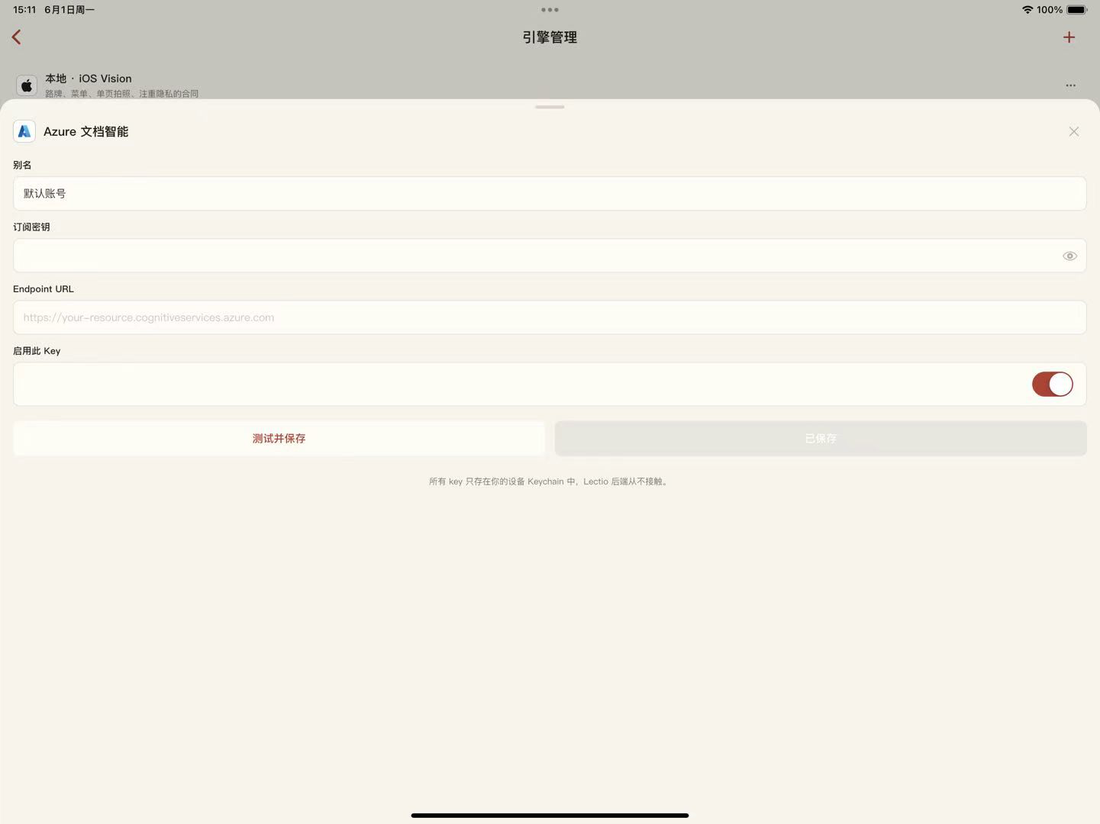









Azure Document Intelligence
Microsoft's document OCR — steady layout and tables, 500 free pages a month.
① Users in mainland China should use a VPN — searching domestically may redirect to CN Azure, which has different services and policies.
② To register for a free trial account, please have a valid credit or debit card ready for identity verification. You will not be charged during the free credit period.
Access Azure Portal
- 01
Search & Open Azure Portal
Search Microsoft Azure Portal in your browser, or visit:
https://azure.microsoft.com/en-us/get-started/azure-portal
⚠ Users in mainland China should use a VPN — the domestic CN Azure has different services.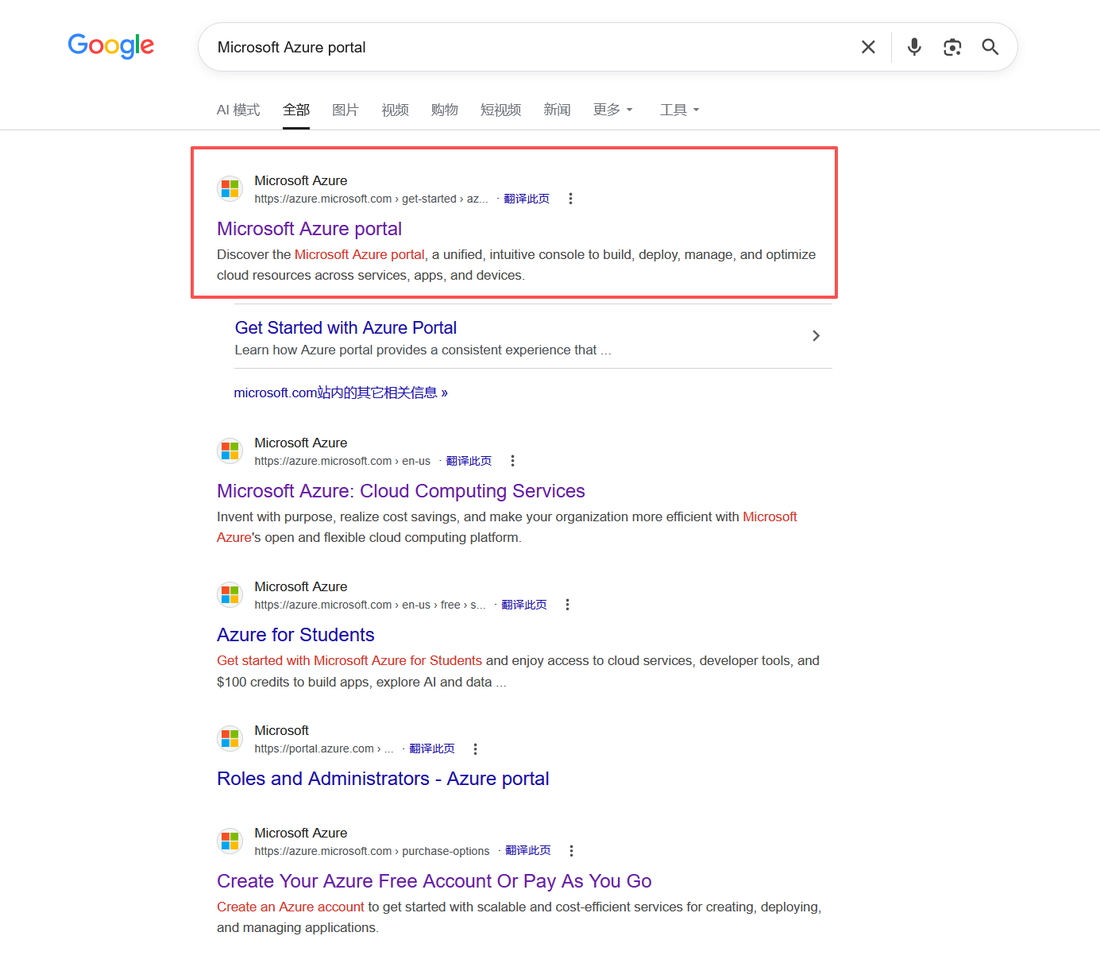
- 02
Azure Homepage
On the Azure homepage, click Sign In at the top-right to log in, or click to register a free account.
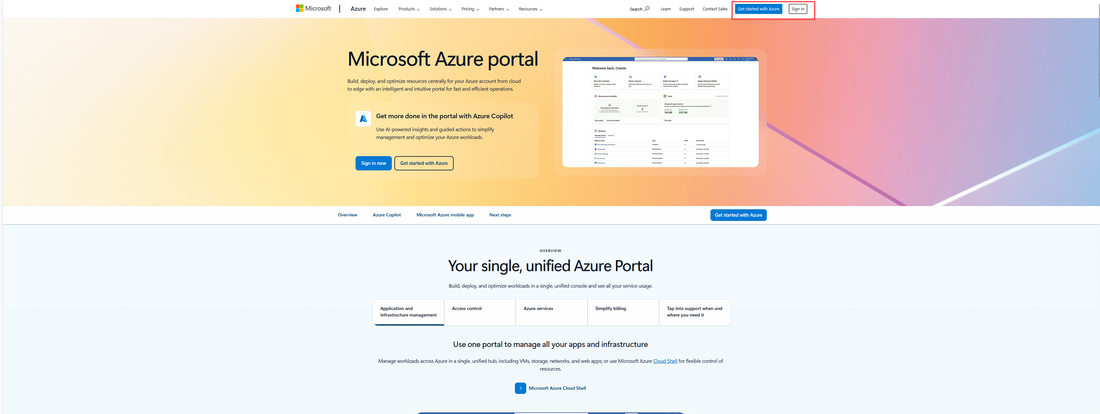
Sign In or Register
- 03
Sign In With Microsoft Account
Sign in with your existing Microsoft or GitHub account, or register a new one.
New Azure Free Account users typically receive USD 200 credit, valid for 30 days.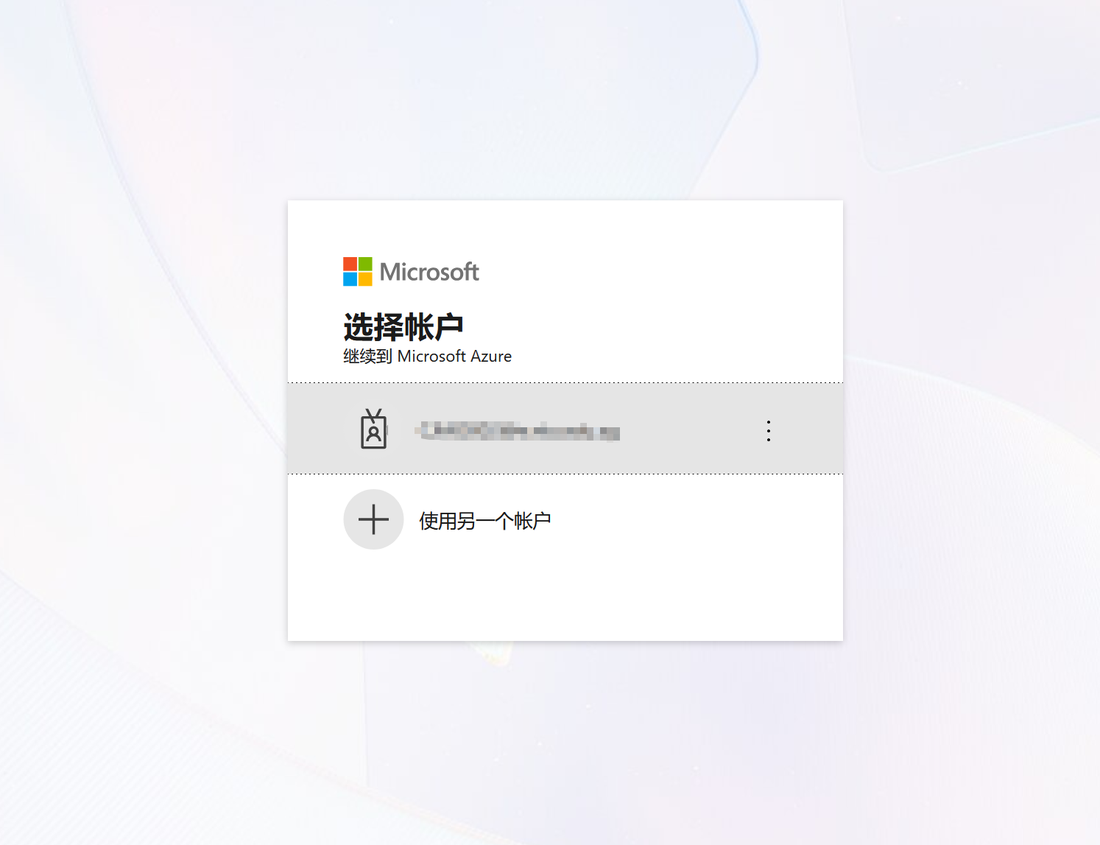
- 03A
Register Free Account (Optional)
To register a free account, visit:
https://azure.microsoft.com/en-us/pricing/purchase-options/azure-account
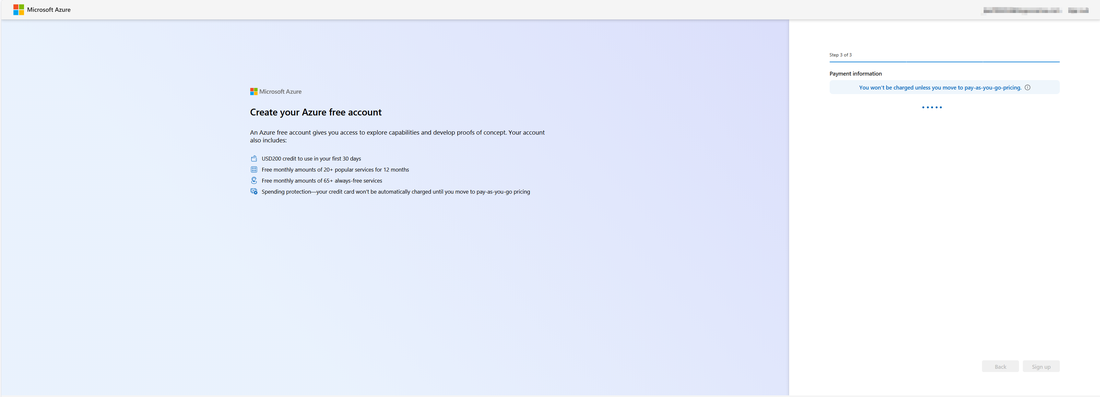
You'll need: Microsoft/GitHub account + phone number + credit or debit card (verification only, not charged during free period).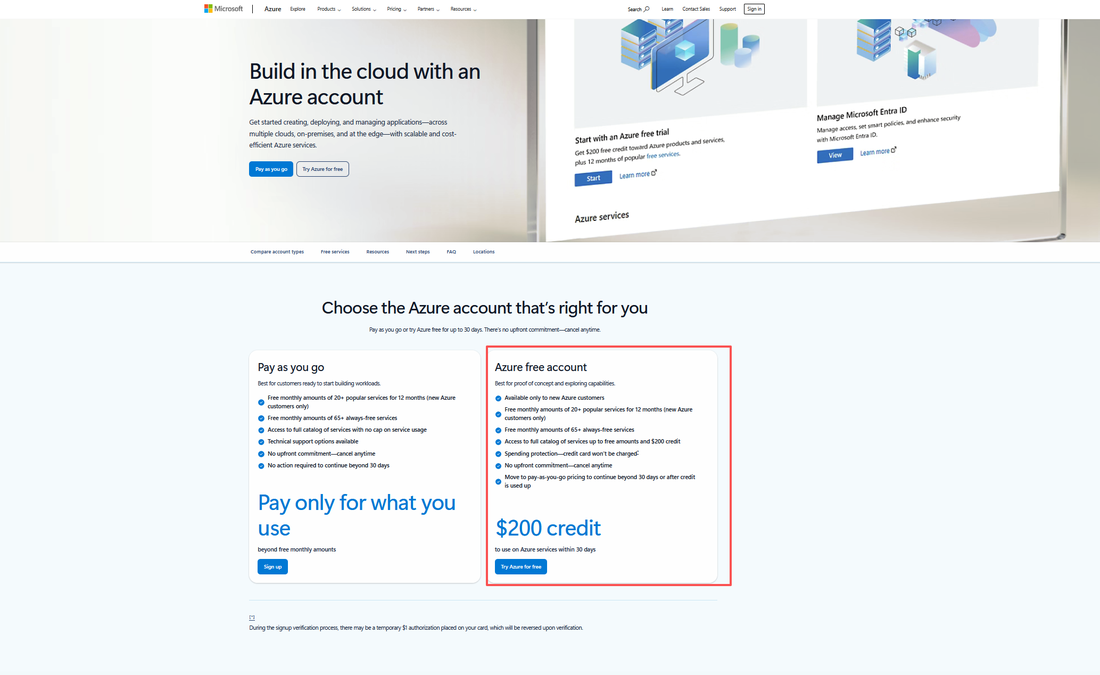
- 03B
Registration Complete
After registration you'll be redirected to the Azure Portal home. Existing accounts land on the same page after signing in.
Create Document Intelligence Service
- 04
Search "Document Intelligence"
In the Portal search bar, type:
• English: Document Intelligence
• Chinese UI: 文档智能
⚠ Current OCR is under Document Intelligence — NOT the old Computer Vision service.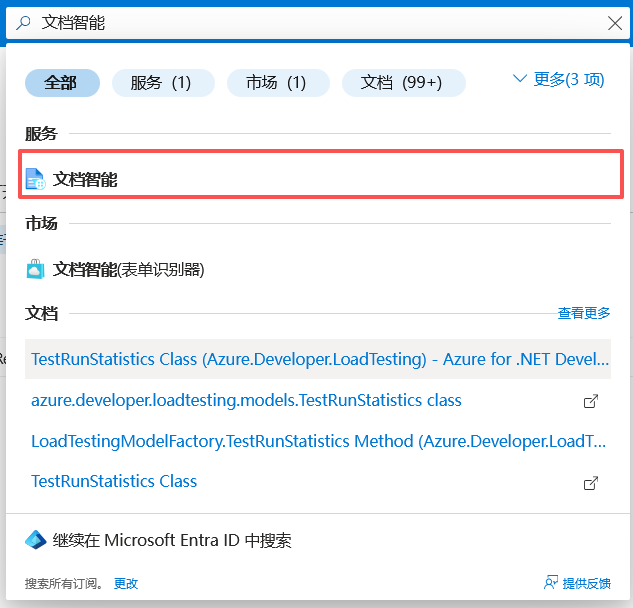
- 04A
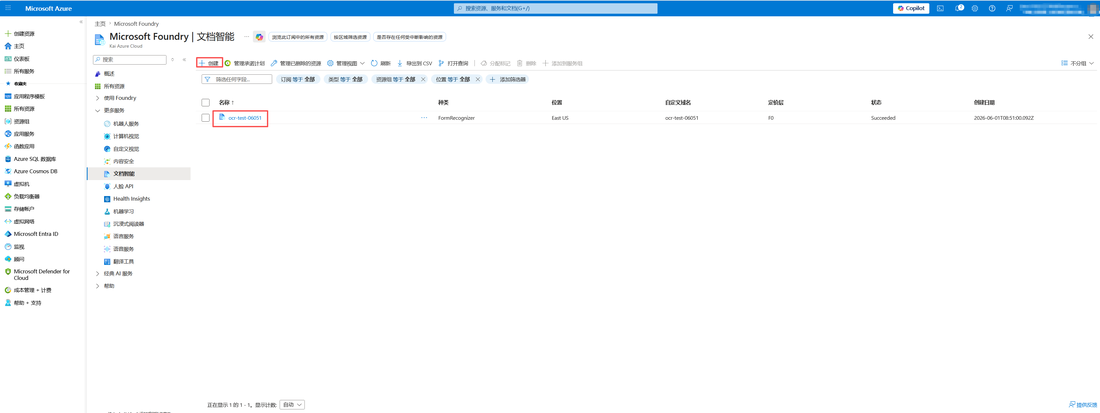
Document Intelligence Service Page
After searching, you'll land on the Document Intelligence page. Click + Create to start creating a new service resource.
- 04B
Fill in the Creation Form
Fill in these fields (keep others as default):
• Subscription: Select your subscription
• Resource Group: Create new or select existing
• Region: Choose the region closest to you
• Pricing Tier:
— F0 (Free): 500 pages/month limit, ideal for personal evaluation, no charge
— S0 (Standard): No page limit, pay-per-use, for regular production use
Recommended: start with F0 to try it out, upgrade to S0 when needed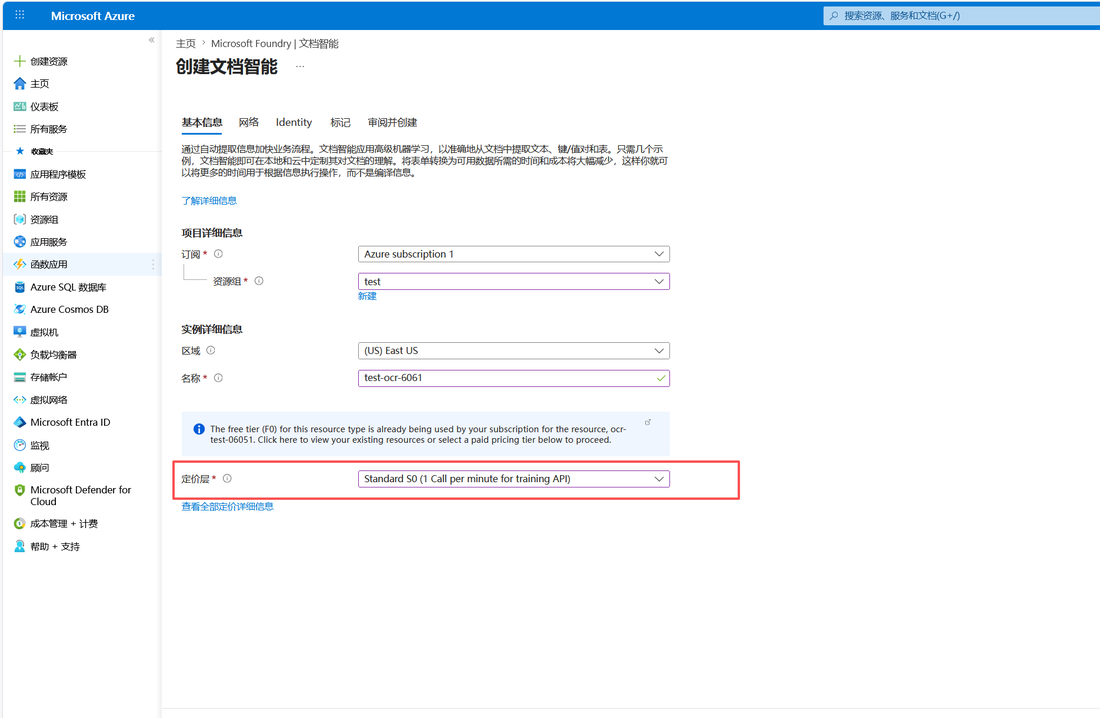
- 04C
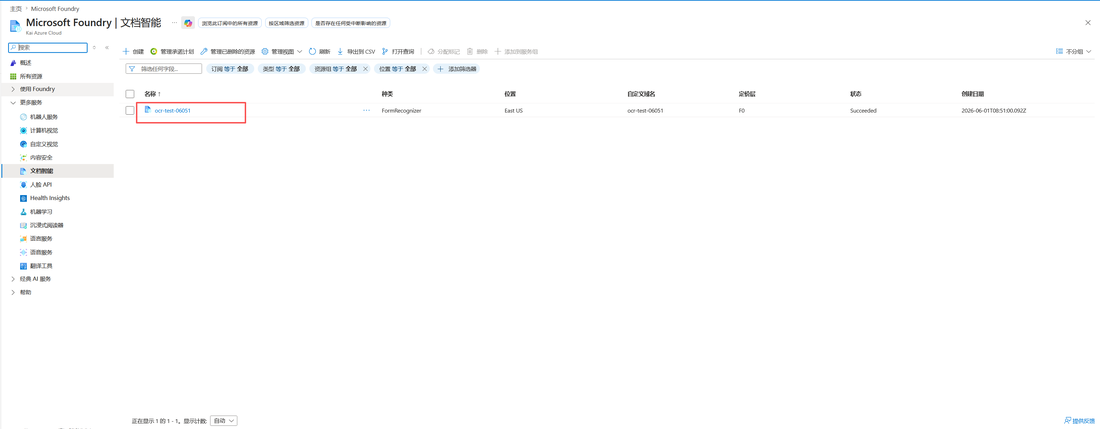
Review & Deploy
Confirm your Pricing Tier selection (F0 free / S0 standard), then click Review + Create → Create. Wait 1–3 minutes for deployment.
Path A · Online Test (Optional)
- 05A
Enter the Online Test UI
After deployment, click Go to resource to open the service detail page.
Then click "Try in Document Intelligence Studio" to open the online test environment.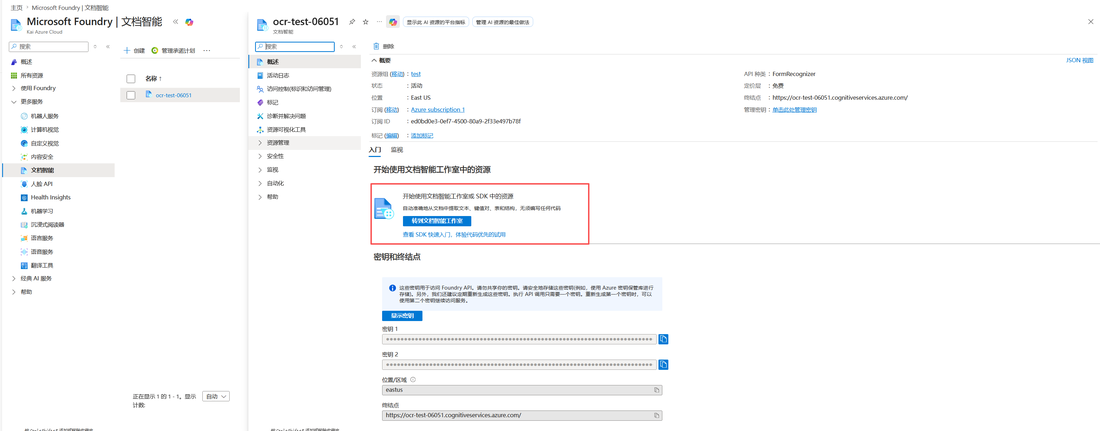
- 05B
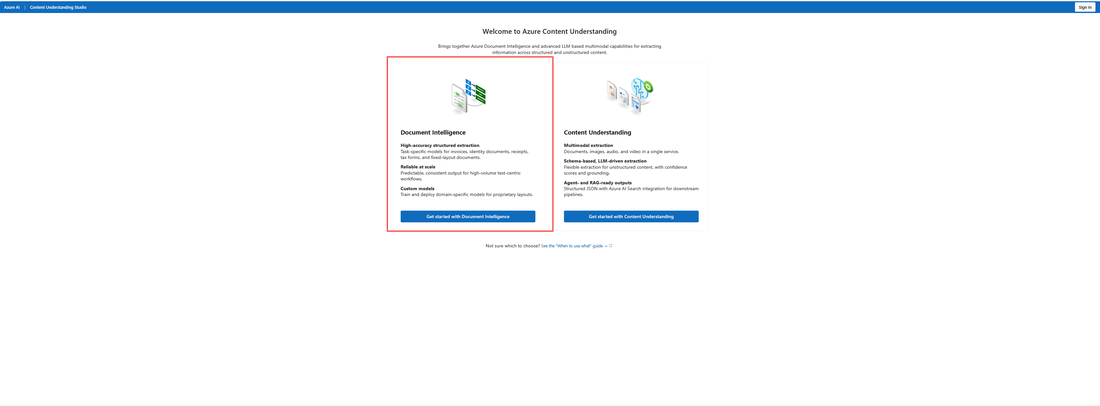
Redirect to Studio
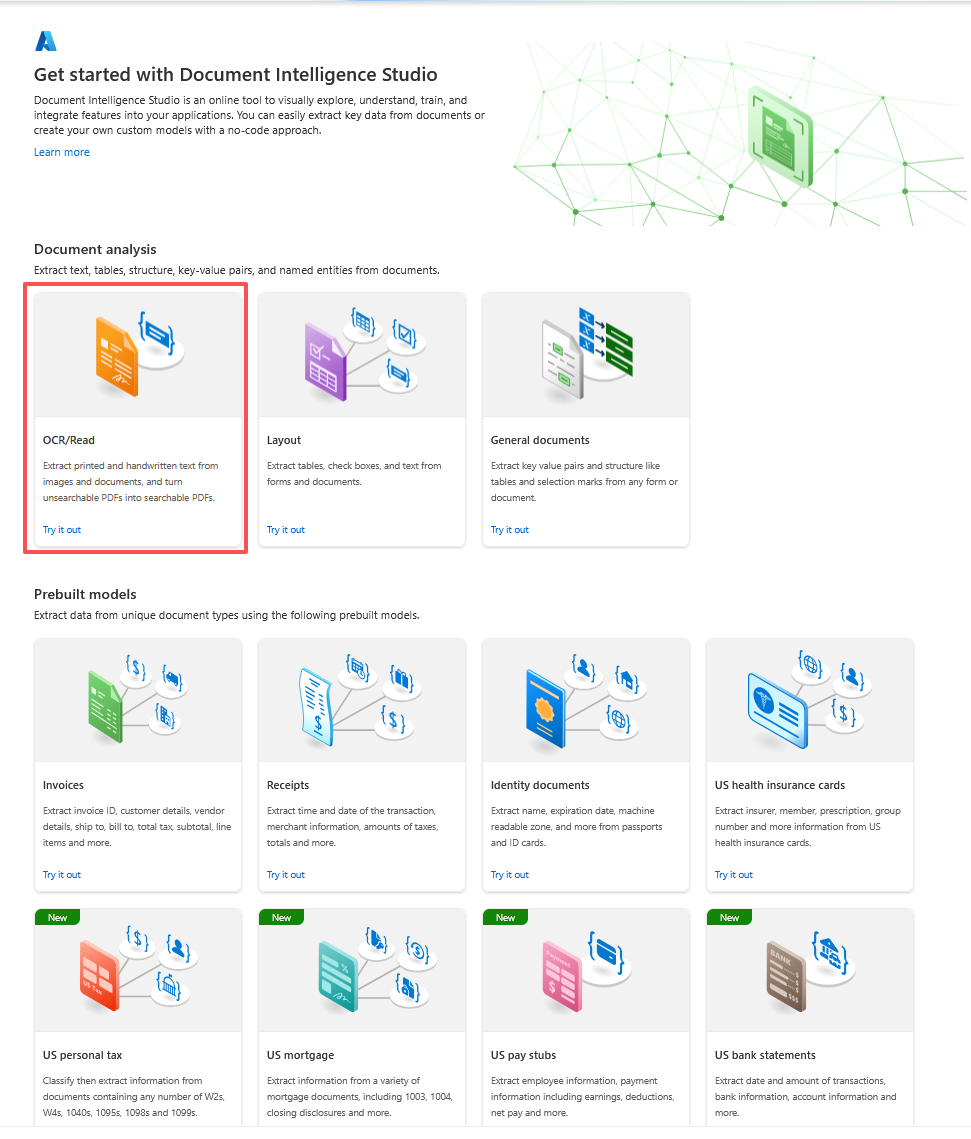
Inside Document Intelligence Studio, choose the OCR-related module on the left panel.
- 05C
Select OCR / Read Function
From the function list, select Read (general OCR) for recognizing text in images or PDFs.
- 05D
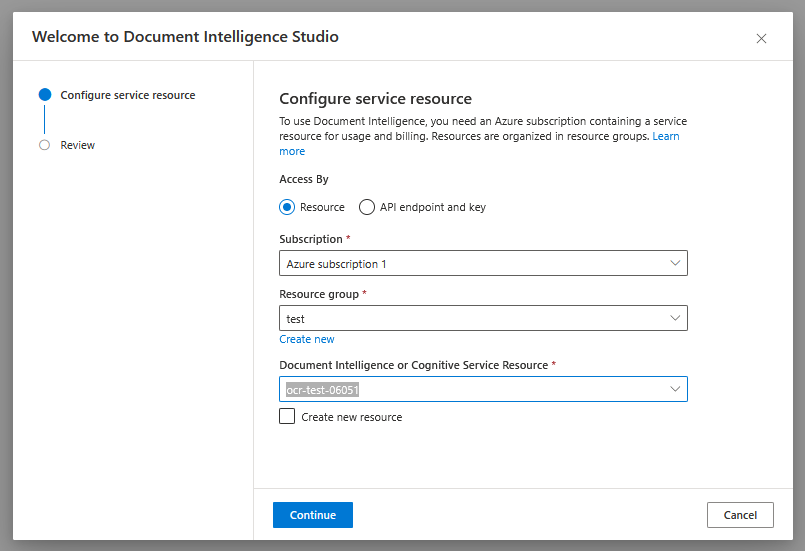
Select Your Service Configuration
In the dropdown menus, select the subscription and resource you just created to link the test with your service.
- 05E
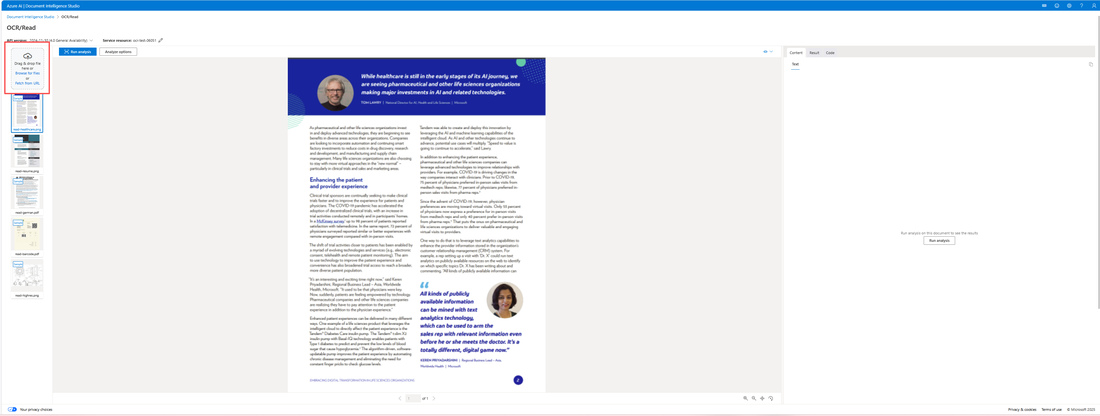
Upload File & Test
Drag or upload a local image or PDF in the top-left area, then click Run analysis to start recognition.
- 05F
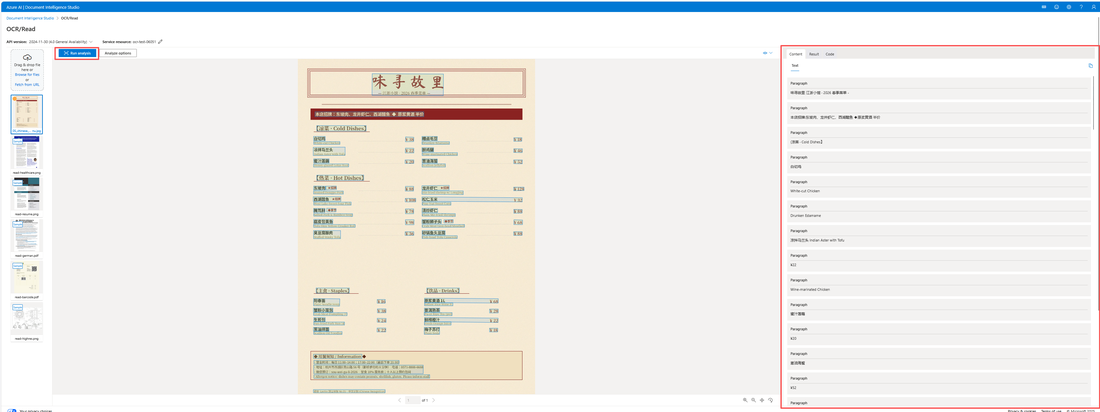
View Recognition Results
Recognition results appear on the right. View specific fields or export results in JSON format.
Path B · Get API Key & Endpoint (Required)
- 06
Copy API Key & Endpoint
Back on the service detail page, click Keys and Endpoint in the left menu.
Copy Key 1 (or Key 2) and the Endpoint URL. Save securely — never share them.
Both are required to connect Lectio to your Azure service.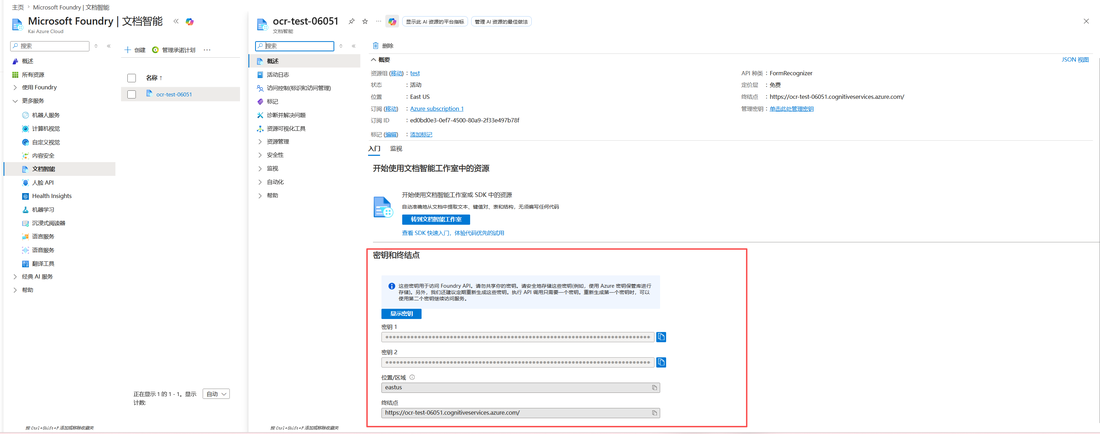
Configure Lectio App
- 07A
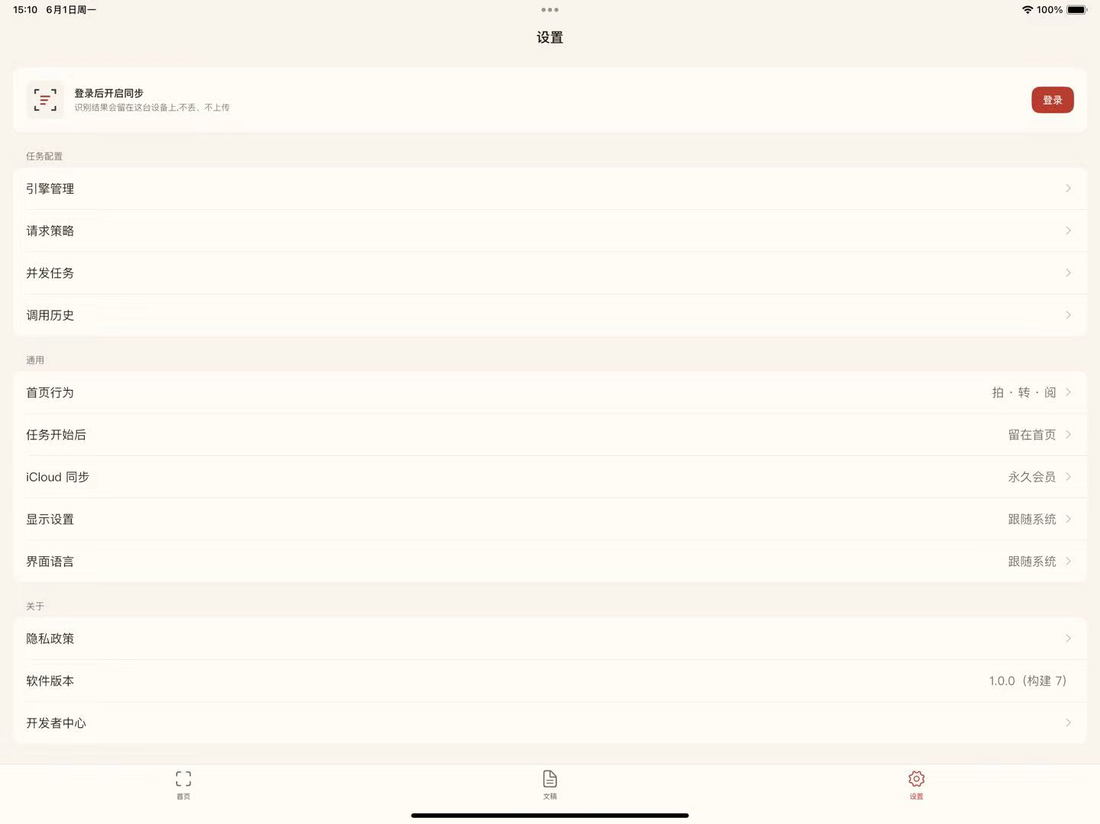
Open Engine Management
Open the Lectio app, go to Settings → Engine Management to see the list of OCR engines.
- 07B
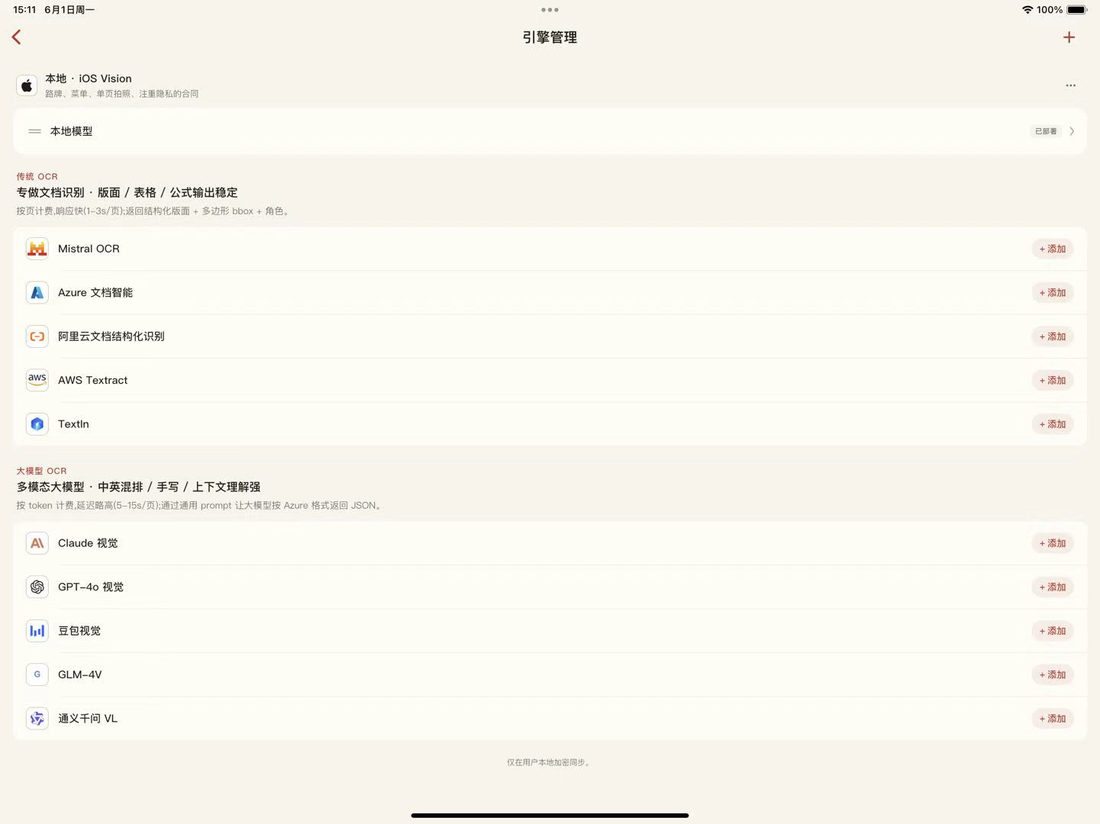
Select Microsoft Azure
Find Microsoft Azure in the engine list and tap Add / Configure to open the setup screen.
- 07C
Enter Credentials & Save
Enter the API Key and Endpoint from Step 06 into the respective fields.
Tap Test to verify connection, then tap Save to complete setup.